To carry out the conversion, you need to start in QuickBooks Desktop. Remember to use a copy of the QuickBooks Desktop company file that’s saved to a local drive, such as your computer’s C: drive. You should already have done this as part of your pre-conversion tasks.
Export the company file from QuickBooks Desktop
- Open the company file in QuickBooks Desktop as the Admin user
- Make sure that you’re in single-user mode. You can tell if you’re in multi-user mode because the title bar will say “(multi-user)(Admin)” at the end. To change to single-user mode, go to File and select Switch to Single User Mode
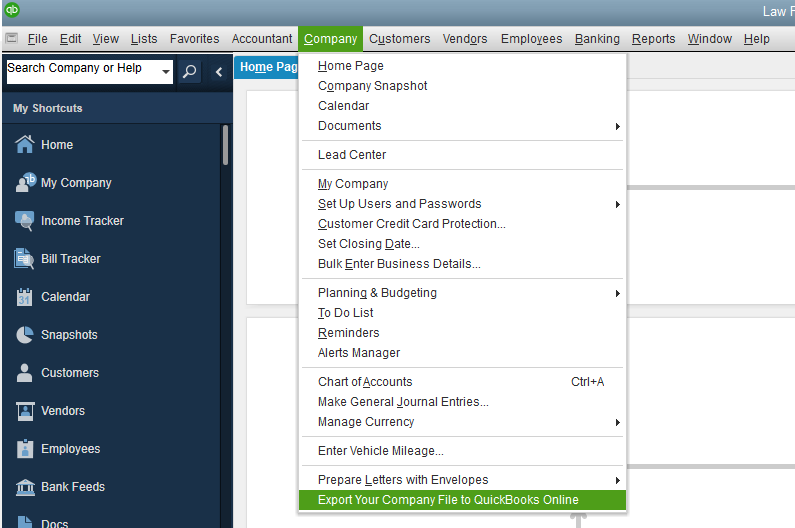
- Select Company from the top menu bar, then scroll down and select Export Your Company File to QuickBooks Online
- Next, you’re asked if you’re ready to transfer the company file to a QuickBooks Online account. As you’ve already set up a QuickBooks Online subscription, and you’re ready to do the conversion, select Move now
If a subscription hasn’t been set up yet, you can sign up for a 30-day free trial at this stage of the conversion. To do this, you’d select Try it First and follow the instructions. The trial will be a QuickBooks Online Advanced subscription that the client can downgrade later, if desired.
Decide whether to convert inventory (if applicable)
Although this fictitious company file doesn’t have inventory turned on, this step is worth knowing.
If there is inventory in the company file—and the inventory preference is turned on in QuickBooks Desktop—you’ll get a message asking you to choose if you want to track inventory in QuickBooks Online. If the client isn’t using inventory, or you turned off the Inventory preference when you were preparing the QuickBooks Desktop file, you won’t get this message.
If you select Yes, track inventory using FIFO, you’ll be asked for the date you want to start tracking FIFO (First In, First Out) inventory in QuickBooks Online.
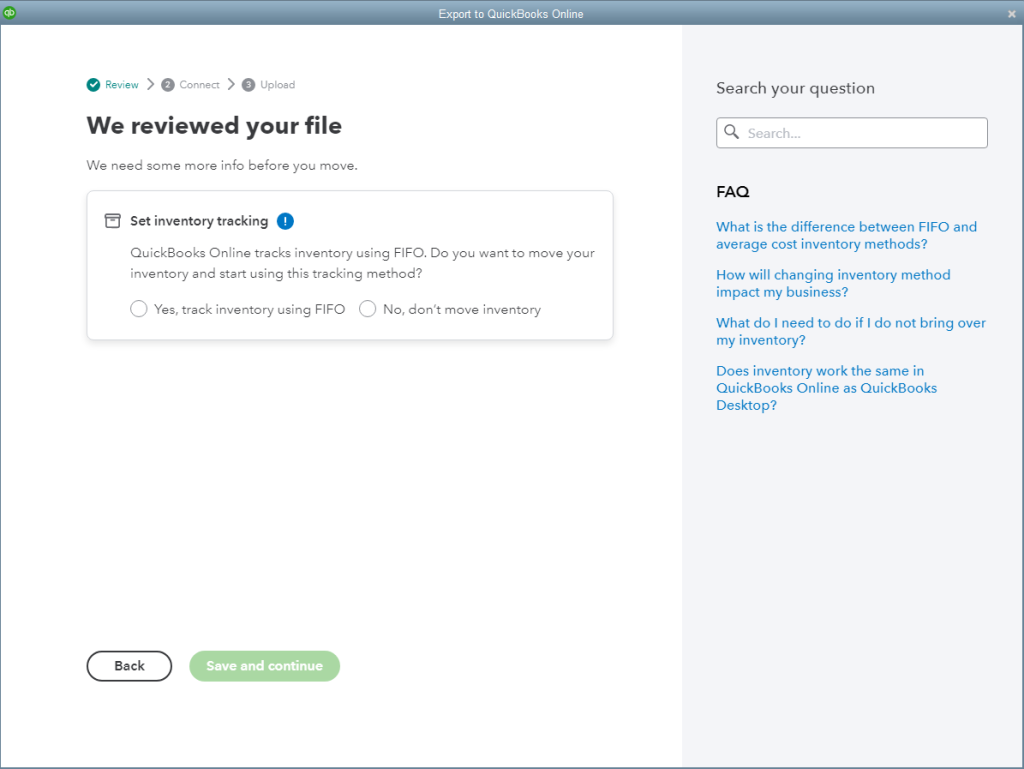
Note: QuickBooks Online tracks inventory using the FIFO (First In, First Out) method, whereas QuickBooks Desktop uses the Weighted Average Cost inventory. Here are a couple of articles explaining each method:
- How to use Weighted Average Cost inventory to measure costs of production.
- What FIFO is, and how it’s used for inventory cost accounting
You can learn more about how to import a QuickBooks Desktop file with inventory in the Converting a QuickBooks Desktop file with Payroll or Inventory lesson.
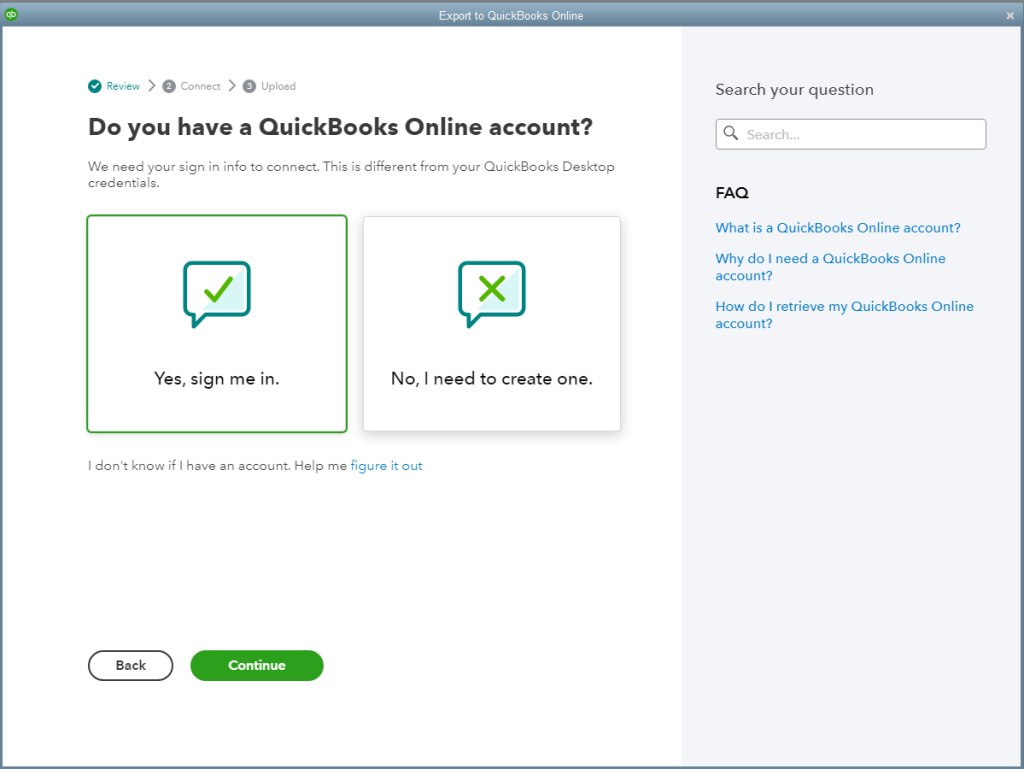
Sign in to your QuickBooks Online Accountant account
Next, you’re asked if you have a QuickBooks Online account or if you need to create a new one.
- As you’ll be carrying out the conversion for your client, you need to sign in using your own credentials. So select Yes, sign me in, followed by Continue
Note: If the client is doing a conversion themselves and doesn’t have a QuickBooks Online login, they’d select No, I need to create one and follow the instructions.
On the next page, enter your QuickBooks Online sign-in credentials, then select Sign In
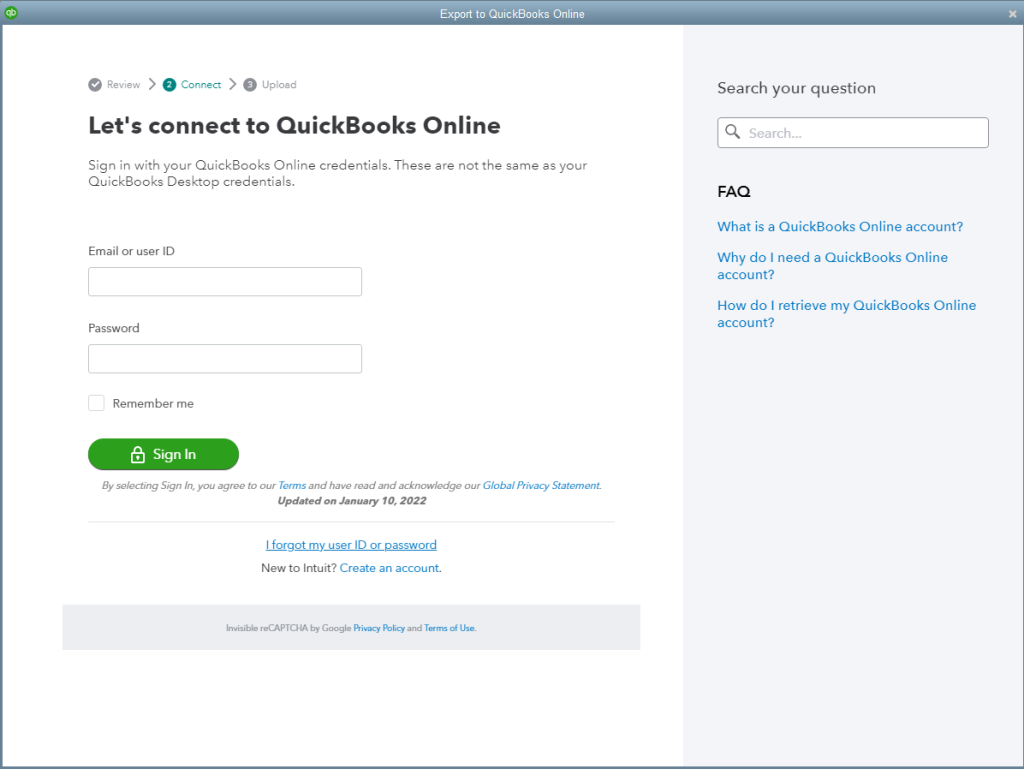
The sign-in uses multi-factor authentication. So if you’re asked to confirm your identity, enter the verification code you’re sent via SMS or to your registered email.
Choose where to move the QuickBooks Desktop file
Once you’ve signed in to QuickBooks Online Accountant, you’ll be asked to choose the QuickBooks Online company to which you want to move the QuickBooks Desktop file.
Here, you’ll see a list of all the companies in your accountant portfolio—including the one you created for this conversion. You’ll also see your own accounting or bookkeeping firm.
Select the appropriate QuickBooks Online company (in this case, Brooks Law Firm) and select Continue.
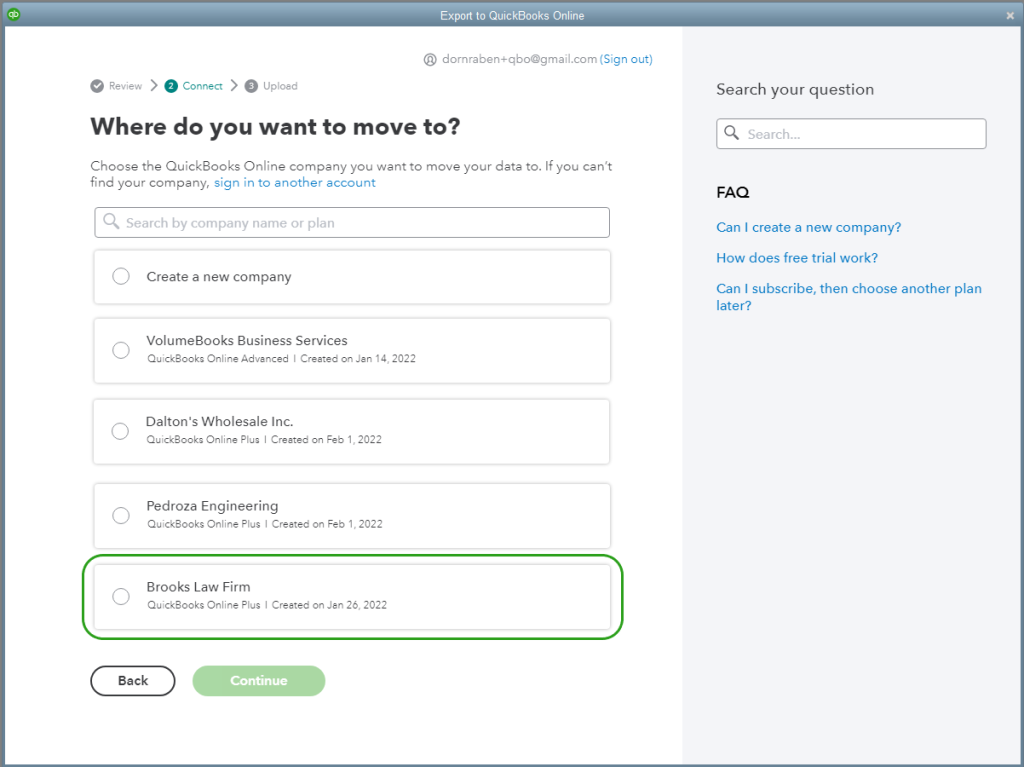
Important note: Make sure you select the correct QuickBooks Online company! The conversion process will replace any existing data, and you don’t want to overwrite another client’s company.
You may also get an option to create a new QuickBooks Online company. With this option, QuickBooks Online will automatically set up a new 30-day free trial Advanced subscription. If the client doesn’t want to continue with Advanced, they can downgrade their subscription later.
You have up to 60 days from when you sign up for a QuickBooks Online subscription to transfer company data from QuickBooks Desktop. If you select a client company for which the subscription is older than 60 days, you’ll get an error message.
If you’re converting the QuickBooks Desktop company into the Your Books area of QuickBooks Online Accountant, you have 120 days from the time you signed up for QuickBooks Online Accountant to do the conversion.
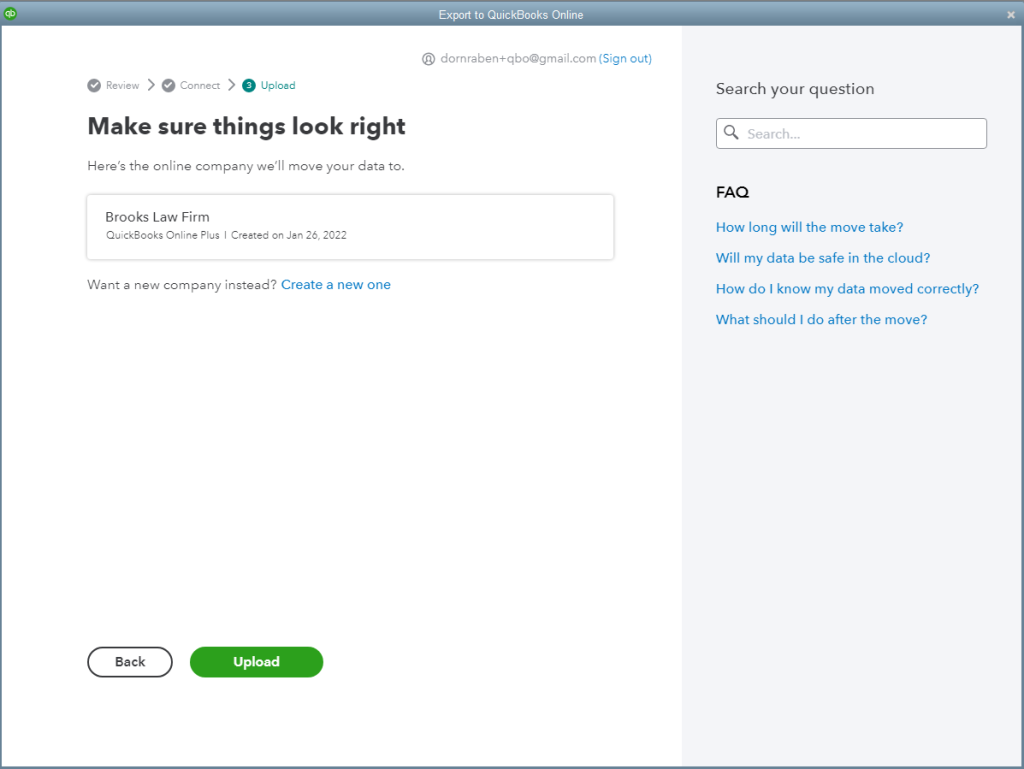
Execute the conversion process
Next, you need to confirm that you want to initiate the conversion process to the selected QuickBooks Online company.
If it all looks good, select Upload.
You’ll see the conversion progress as it takes place.
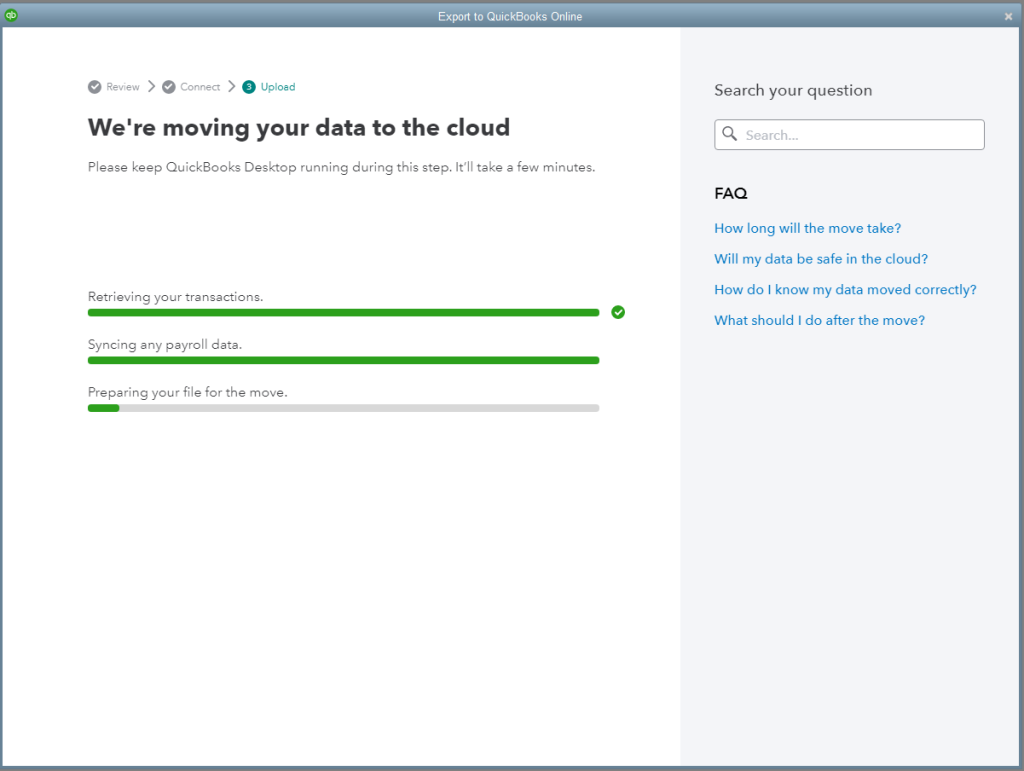
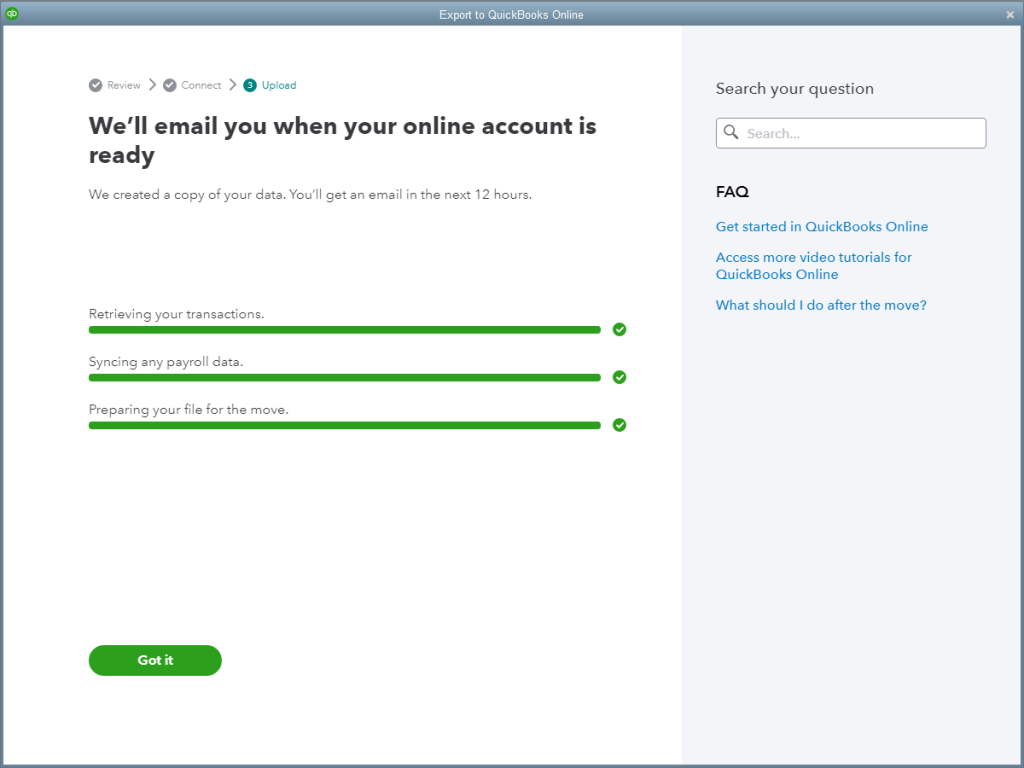
Once the data has been moved, QuickBooks spends a few moments setting up the new QuickBooks Online company file. The conversion tool tells you that you’ll get an email when everything is ready.
What happens when the conversion is complete?
When the conversion is complete, QuickBooks sends out two emails:
- One email is sent to the Primary Admin assigned to the QuickBooks Online company, letting them know that the data is now available in QuickBooks Online. Because you set up the company and carried out the conversion, this email will be sent to you
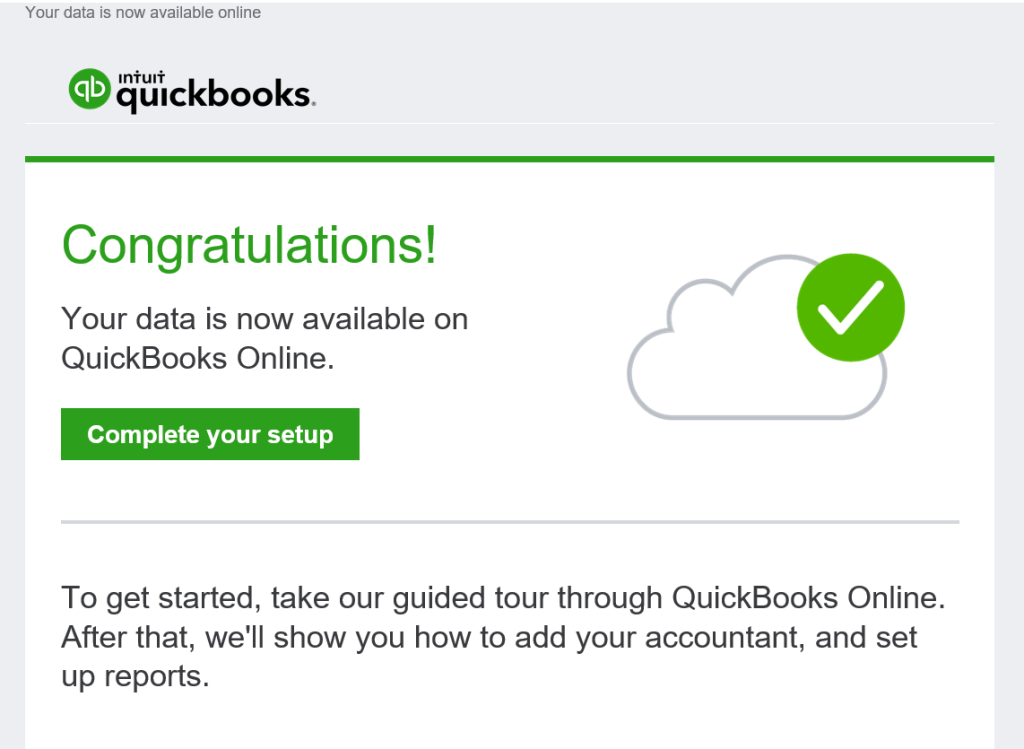
- A second email is sent to the lead accountant assigned to the company. This email includes a spreadsheet containing an Import Summary report about the conversion, containing key details such as a comparison of how many accounts, customers, vendors, etc. are in the QuickBooks Desktop and QuickBooks Online companies
In this example, because you created the company subscription from QuickBooks Online Accountant, you are the lead accountant as well as the Primary admin. So you’ll receive both emails.
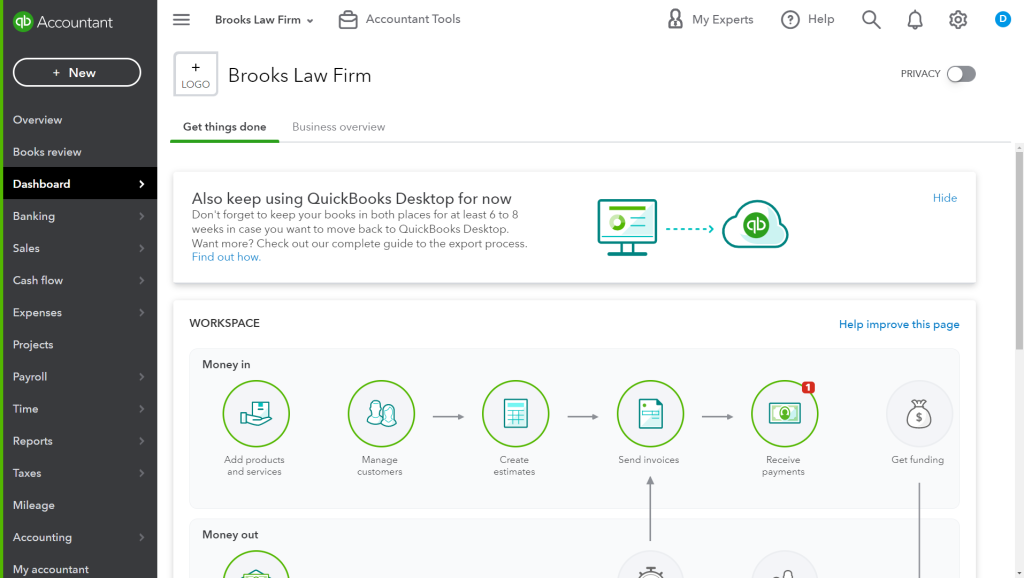
When you sign back in to QuickBooks Online Accountant, you can open the client company and start to
We’ll cover the tasks you need to do at this stage in the lessons on Validating the integrity of a QuickBooks Online company and Configuring a QuickBooks Online company after conversion.