You might need to set up and create custom fields, depending on how they were configured in QuickBooks Desktop.
If your client was using customized forms in QuickBooks Desktop, you should create these in QuickBooks Online too. Custom forms might require custom fields, which is why you should set up custom fields first.
Add custom fields
To open custom fields in QuickBooks Online, go to the Gear icon and select Custom fields.

To create a new custom field, select Add field and fill in the details as required.
You can update the settings of any custom fields already added to the company by selecting Edit in the Actions column.

Customize forms
In QuickBooks Online, you can customize invoices, estimates, and sales receipts. If your client was using customized versions of these forms in QuickBooks Desktop, they might want you to create similar versions in QuickBooks Online.
To do this:
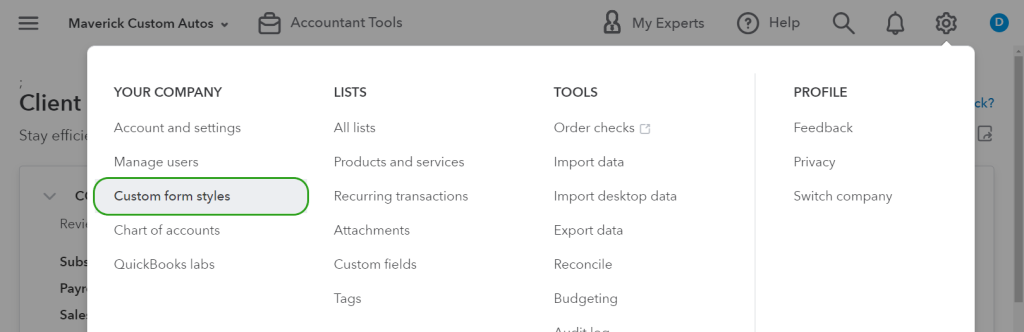
- Go to the Gear icon and select Custom form styles
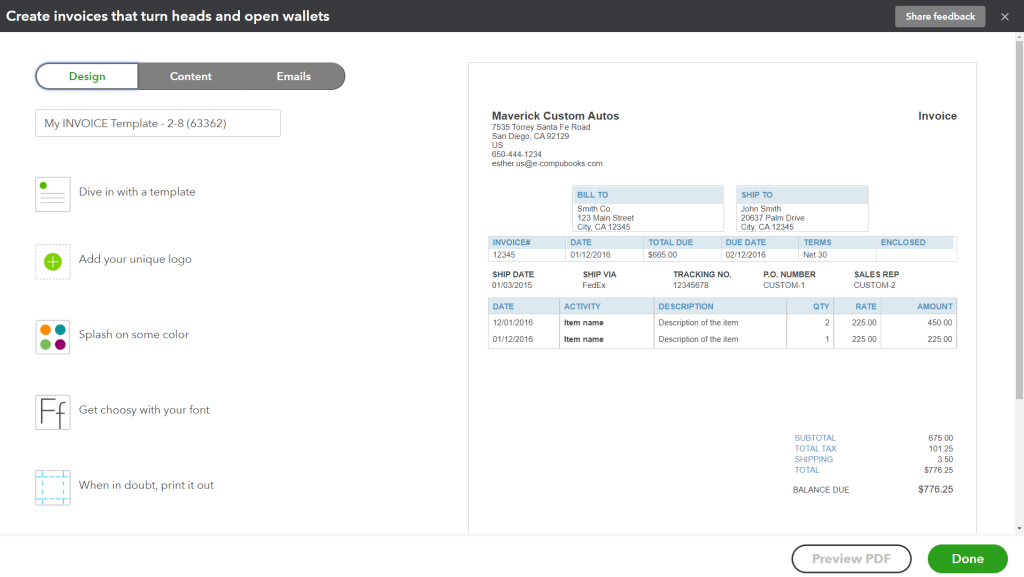
Select the dropdown next to New style and choose the type of form you want to customize

- Use the options in the Design, Content, and Emails tabs on the left to customize the form according to the client’s preferences
- When you’re ready, give the form a unique name, then select Done
Follow the link to discover more about customizing invoices, estimates, and sales receipts in QuickBooks Online.